在EdgeX Foundry中有南向和北向的概念
在数据获取的过程中我自己大略画了一个流程图
在数据获取的过程中 南向就是数据的产生方,北向就是最终数据的利用方
在这个系列的文章中,我没有用官方的虚拟设备服务(device-virtual),因为我个人觉得那样的描述不能很好的体会EdgeX中的各种概念,
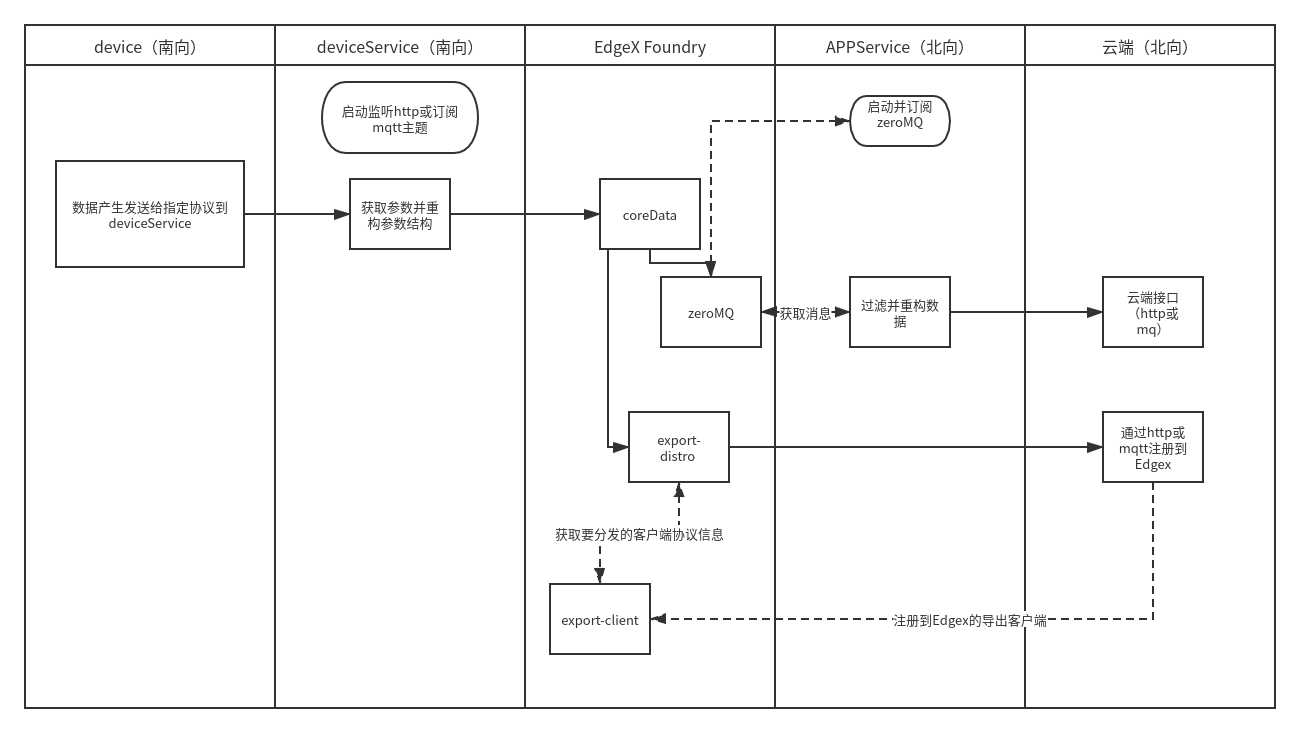
这个图可能没开发过的也是看不懂的,接下来一点一点的把上图的内容尽可能的说清楚。
从南向北说
最南端是设备,比如温度传感器,门禁控制器,智能电表,摄像头等等的可以产生数据的装置甚至是软件
我们先来三台机器(用三台的原因是这样更容易把概念区分开)
192.168.1.11(简称host1) 设备
192.168.1.12(简称host2) 运行EdgeX的主机
192.168.1.13 (简称host3)运行deviceService的主机
本文中讲用简单的PHP程序当做数据的产生器也就是设备, 原因很简单, Ubuntu安装Apache + PHP 的环境非常简单
我也尽可能的同步的用go语言来实现相同的功能
先实现最简单的功能, 没隔10秒产生一个[1-127] 的随机数
|
|
先不要纠结这个小程序的功能,先有在慢慢改
从根据图上说, 要 能用http请求或者是mqtt的方式把产生的随机数发送上来,我们的案例就以一个http的方式来实现发送产生的数据到设备服务(deviceService)
修改上面的代码, 主要功能是把产生的随机数POST到一个指定的url
|
|
因为现在还么有开始写deviceService 所以写了一个简单的服务端用来验证, 就是把接收到的随机数追加到一个文件中, 代码中的context.txt文件是要和main.go同一个目录, 并手动创建
这不是必要的内容, 只是用来验证上面产生数字并能争取发送出来而已
|
|
到现在一个产生随机数的设备就已经有了, 你可以当它是温度或者湿度,或者其他的产生数字的设备就可以了
接下来是设备服务
设备服务主要参考
git clone https://github.com/edgexfoundry/device-rest-go
cd device-rest-go
make build
注:在windows环境中, make命令好像挺麻烦的,用Windows系统的同学自己查一下把, 我也不太会, Linux比较简单
现在我们可以体验一下数据上传到EdgeX了, (注意到目前还没有往北向发送, 只是数据能正常的发送到EdgeX)
启动虚拟机运行起来EdgeX服务
例如 在host2 执行命令 sudo docker-compose up -d 请参考第一节的内容
并停掉其中两个服务(如果启动了的话)sudo docker-compose stop device-virtual device-random 停掉的原因是为了不要让这两个服务产生的数据影响之后的判断
启动以后我们来修改device-rest-go(这个项目是没有fuji发行的,直接用master就好了)
cd device-rest-go/cmd/res
里面有一些文件|目录
-- docker
-- configuration.toml
--sample-image-device.yaml
--sample-json-device.yaml
--sample-numeric-device.yaml
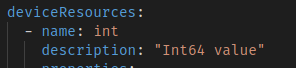
我们的设备是产生随机数所以和我们最相似的是sample-numeric-device.yaml
cp sample-numeric-device.yaml rand-numeric-device.yaml
我们删掉一些内容在下面的代码中用删除线(其实也就是删除float的部分), 修改的内容把原来的内容在#号后的注释中写名
|
|
下面来一个清爽的
|
|
接下来我们要修改 configuration.toml 文件
打开它找到最后DeviceList的部分,把 name=sample-json 和 name=sample-image的都删掉
把name=sample-numeric 改成 name=rand-numeric 这是定义了设备名改不改都行
Profile = ““双引号中要写成rand-numeric ,注意这个属性的值和上面rand-numeric-device.yaml文件中的name属性值必须一样
修改文件中所有目前的Host = “localhost” 改为运行EdgeX 服务的虚拟机的ip 即 host2
这里要注意上面修改的host不包括[Service]中的Host,[Service]–>Host的值是将要启动device-rest-go(deviceService)服务的ip地址 host3
如果你是在物理机来运行device-rest-go服务的话, 那也不要写localhost,因为这个信息是要注册给docker的
所以说, 这里一定要写ip而且是一个和运行docker服务主机能互通的ip
修改完把device-rest-go/cmd目录中的 二进制文件device-rest-go 和res目录拷贝到192.168.1.10任意目录, 本机的话直接启动即可
./device-rest-go
Init: useRegistry:  profile:  confDir:
Loading configuration from: /home/koala/project/EdgeX/device-rest-go/cmd/res/configuration.toml

Load configuration from local file and bypassing registration in Registry...
Calling service.Start.
EnableRemote is false, using local log file
level=INFO ts=2020-03-06T09:40:19.996638031Z app=edgex-device-rest source=init.go:138 msg="Check Metadata service's status ..."
level=INFO ts=2020-03-06T09:40:19.996638037Z app=edgex-device-rest source=init.go:138 msg="Check Data service's status ..."
level=INFO ts=2020-03-06T09:40:20.005574323Z app=edgex-device-rest source=init.go:48 msg="Service clients initialize successful."
level=INFO ts=2020-03-06T09:40:20.010404424Z app=edgex-device-rest source=service.go:153 msg="Device Service edgex-device-rest exists"
level=INFO ts=2020-03-06T09:40:20.019431937Z app=edgex-device-rest source=service.go:96 msg="*Service Start() called, name=edgex-device-rest, version=to be replaced by makefile"
level=INFO ts=2020-03-06T09:40:20.022447427Z app=edgex-device-rest source=service.go:100 msg="Listening on port: 49986"
level=INFO ts=2020-03-06T09:40:20.025506267Z app=edgex-device-rest source=resthandler.go:64 msg="Route /api/v1/resource/{deviceName}/{resourceName} added."
level=INFO ts=2020-03-06T09:40:20.033438364Z app=edgex-device-rest source=service.go:127 msg="Service started in: 37.360847ms"
启动后可以看到监听端口是49986 uri /api/v1/resource/{deviceName}/{resourceName}
所以拼接url是 http://host3:49986/api/v1/resource/{deviceName}/{resourceName}
deviceName 根据configuration.toml文件 [DeviceList][Name]属性的值
resourceName 对应rand-numeric-device.yaml

http://host3:49986/api/v1/resource/rand-numeric/int
发送post数据 任意整数(忽略我的IP)
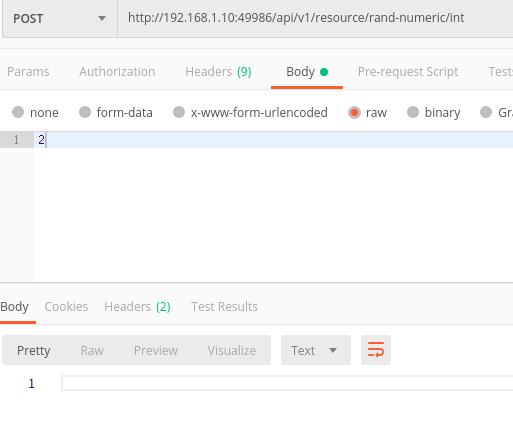
在这里没有消息就是好消息 ,官方的代码中没有写返回的内容
在浏览器中打开下面的链接(ip是运行EdgeX 的docker服务的主机IP
http://host2:48080/api/v1/event/count
每发送一次, 刷新页面 ,返回的数字就+1
如果是这样,那么我们就可以修改我们的设备代码把里面的url替换成
http://host3:49986/api/v1/resource/rand-numeric/int
|
|
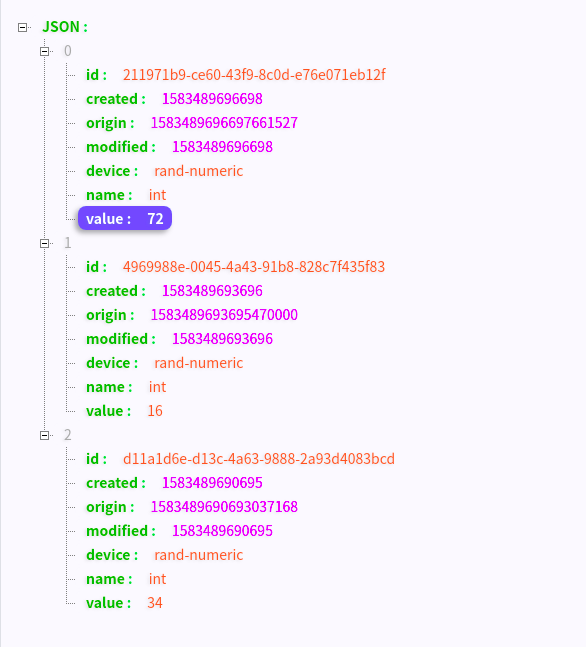
http://host2:48080/api/v1/reading/name/int/3 (http://host2:48080/api/v1/reading/name/:name/:limit)
name是resourceName limit就是看最新的几条
这个接口比上面count结尾的接口更具有观赏性
可以随着设备数据的产生从而看到数据是跟着设备数据变化二变化的
下面我们来分析代码
打开这个项目, 最好用一个编辑器
先打开device-rest-go/cmd/main.go的文件

跟进到
Bootstrap

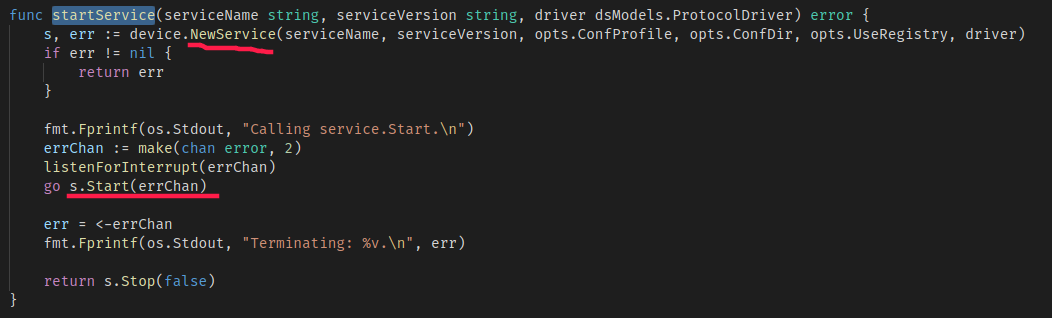
NewService
s.Start(errChan)

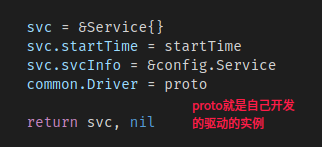
这里初始化了自己的驱动中的Initialize() 传了参数 s.asyncCh
这个时候我们回过头来看 device-rest-go/driver/restdriver.go中的Initialize方法
handler := NewRestHandler(sdk.RunningService(), logger, asyncValues)
return handler.Start()
——»
handler.service.AddRoute(apiResourceRoute, handler.addContext(deviceHandler), http.MethodPost)
——»
deviceHandler是一个方法
|
|
processAsyncRequest方法中
|
|
asyncValues发送到管道中也是初始化驱动时的传参 s.asyncCh